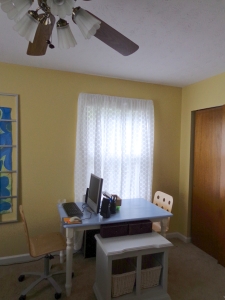
Maybe a better question is: what happens when you get your grandmother’s old dining table and you just can’t quite sell your old one cause it is your style after all?
Since we first moved into our house, I have wanted to find a round table with leaves for our eat-in kitchen nook. Our rectangular table just never looked quite right there, and when we put it in the dining room proper we never used it. It just felt too lonely and too big for just two people. So when my grandmother offered her dining suite to me, which features a lovely round table with two leaves–I’ve seen this table seat 12 people many times in my life. Perfect!
We now had a good option for just-the-two-of-us dinners, and those rare get-together affairs. (Not that I’m going to lie–we still eat in front of the t.v. most of the time…not proud of that). With this versatile table in the kitchen, the smaller (and yet less functional) one in the dining room seemed redundant. We brainstormed ways to sell the table–a large yard sale with a lot of other things we needed to get rid of, a craigslist posting, or just as part of a donation to Goodwill.
In the end, a yardsale seemed like too much work; I didn’t really think I could sell it for what I thought it was worth on Craigslist, and Goodwill was basically a no-go for the same reason. I hung on to it for a couple of weeks, when suddenly inspiration struck: we had been wanting matching computer desks for a long time, and we had thus far made do with a small old table with the computers facing each other and a chair on each end of the table.
Our new plan–slice our dining table in half!
That’s right. We borrowed a friend’s circular saw, broke out the sander and sliced it right down the middle. After deciding to cut it across “hamburger” instead of the proverbial “hot-dog,” we found the center, and slid the saw across. This was both traumatic and freeing–it was also a terrible mistake that we did not practice using it first on a scrap piece of wood. We were both newbies to this type of un-stabilized tool, and it took a lot of hand sawing and sanding in the end to get the cut edges even kind-of straight.
Later, we cut down two 2x4s into legs of the same length as the originals. These became the back legs for both halves. We felt that they were fairly unimportant style-wise since they were going to be pushed up against the wall and painted the same color as that wall. We bracketed them into place with L brackets and long drywall anchoring screws straight into the table sides and shorter screws into the table top. With some good measurement and trial-and-error, we got them attached without any screws-poking-out-of-things mishaps.
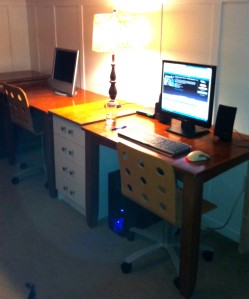
I wish I had some pictures of the process…but as I’ve said, I’ve really slacked off. I am lucky I have any DIY photos from all the projects of the last few months…and there are a fair few to share. In lieu of anything better, here is a terrible iphone pic I took the night we finished.
I have visions of memo boards behind the computers, perhaps the middle console (which are just some random drawers I had in a closet) in a bright color. So far, though, this is now the most functional space in the house, and Derek and I spend more time in the same room now. I don’t want to share any further pics yet, because, as you can glimpse in the background, we recently took on a board-and-batten project. No spoilers!


